So this is my first blogging challenge! I’ve never attempted to do one before, mostly because I kind of bristle at the thought of anything that might turn this blog that I love into ‘work’ or a chore. I’ve always admired other bloggers who are able to keep up with challenges, though, especially daily ones (mad respect to anyone who can do their nails and write a blog post about them every day for a month; you are a better NPA than I). But my favorite nail blogger, Debbie Crumpet, posted about her GOT Polish Challenge last week, and I just loved the idea so much that I’m going to give it a go.
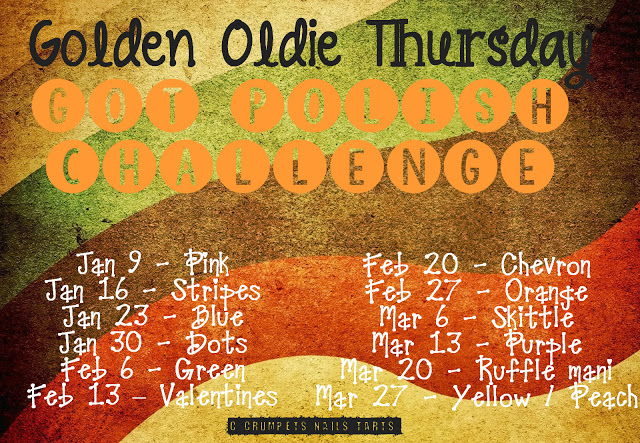
GOT stands for Golden Oldie Thursday, and in this challenge participants will be doing manicures with their older polishes every Thursday in 2014. Each week there is a theme around which everyone will be selecting their polishes and nail art designs. I’m woefully unskilled where nail art is concerned, but I have tons of old polish, and I’ve been trying to ‘shop my stash’ more lately, so I reckon this is the perfect challenge for me!
The rules are pretty simple, and I’m copying them below from the original blog post about the challenge:
* the polish you use should be at least one year old
* if you haven’t been a polishaholic that long, you can use the oldest polishes you have
* the polish should be previously used, but if you’re stuck, you could free a yearling from Mount Untried (seriously, some of mine are reaching puberty out there)
* you can use more than 1 polish as long as it fits the theme and the rules
And here are the themes for the first few months of 2014.
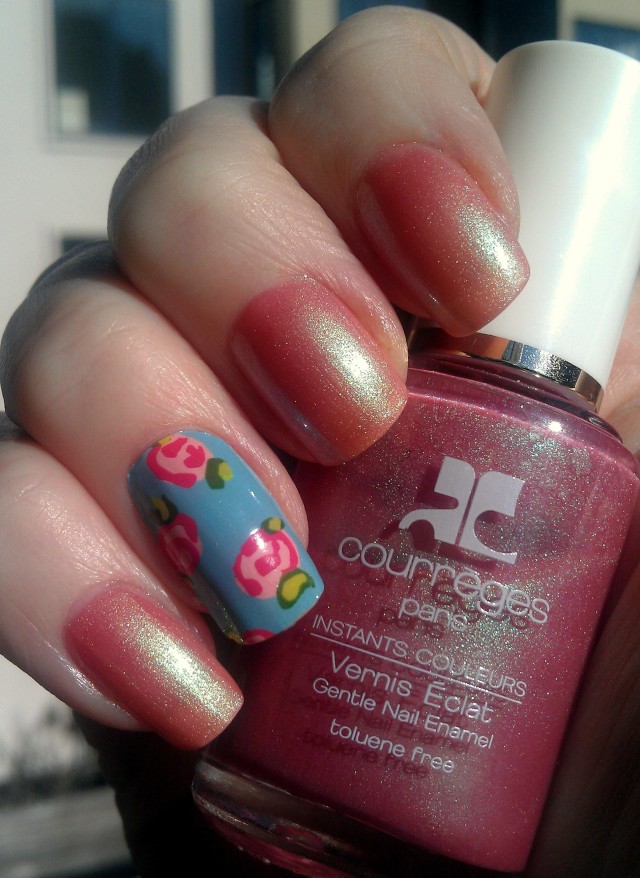
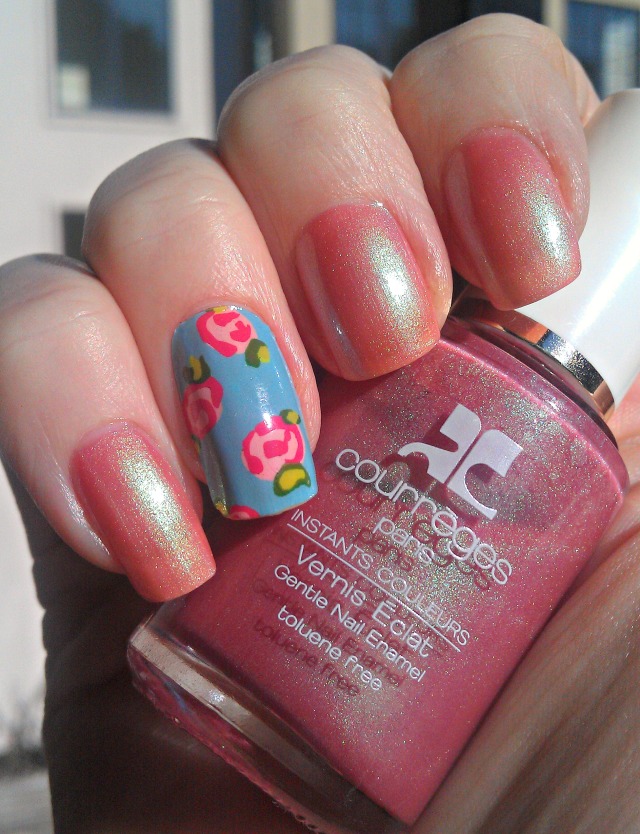
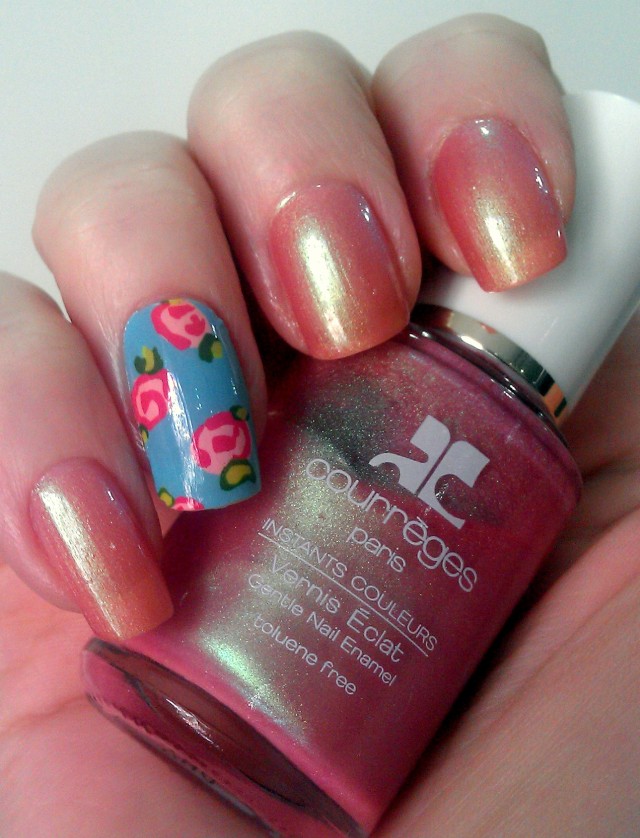
When I was looking through my pinks for today’s theme, I found a polish that I purchased ages ago that has somehow survived the many destashes I’ve done over the years. The polish is from the brand Courrèges, and the shade is Rose (No. 173).
This polish is a medium rosy pink jelly base with a strong greenish-gold duochrome shimmer. The green shift in this polish is visible in all lights and angles, and it really adds a bit of intrigue to this otherwise ordinary color. My love of color, texture, and ~*sparkle*~ are what originally drew me to nail polish, and, when I look at this polish, I can see how it fulfills all of those loves. I remember that the gold to green to pink shift held such intrigue for me when I found this polish all those years ago, and this color play is one of my favorite things about nail polish.
Despite its age, the application for this polish was relatively easy. It applied smoothly and did not need any thinner. It did take a while to dry, which is not at all surprising considering its age.
In keeping with the spirit of the challenge, I used some leftover nail wraps for accent nails with this mani as well. Although they were not more than a year old, I’ve had them sitting around for months but hadn’t yet incorporated them into a mani. I thought a challenge in which I was using old polish was the perfect time to haul out some old, leftover nail wraps and use those, too! The accent nail is the Scratch nail wrap design Vintage Rose. I liked them so much and received so many compliments on these wraps when I first used them. Sometimes I just discard the leftover wraps after using them for a mani, but I love the Scratch wraps so much that I’ve been holding on to the leftovers to incorporate into other manis. Since I opened these a while ago, I knew they weren’t going to last much longer at all, so I’m glad for an excuse to use them before they die.
On to the photos! I used three coats of Courrèges Vernis Éclat Rose for these photos, along with base and top coat. I used top coat over the nail wraps as well.
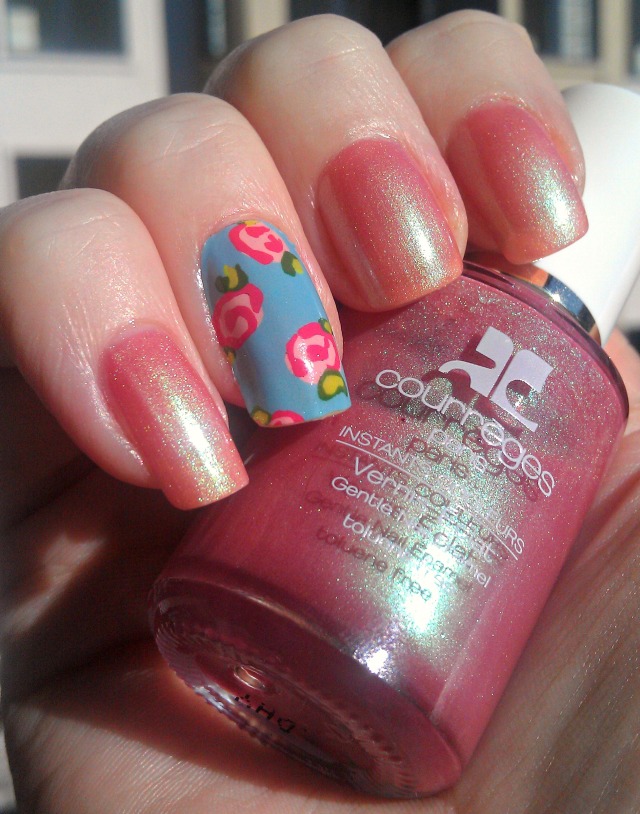
And one in indoor lighting:
What do you think of this golden oldie polish? Can you think of a polish from any of the recent collections that looks like this one?
I’m so excited to participate in this challenge this year and am really hoping I am able to keep up with it! I can’t wait to see what everyone else posts today and as each week progresses. One of my favorite nail bloggers, Ruth from The Adorned Claw, is also participating in this challenge, so definitely go check out what she’s done with today’s theme as well!
I purchased this polish many years ago in what seems like another lifetime when I was living in Japan. It may well be the oldest polish I own (I still kind of can’t believe that I’ve never gotten rid of it in one of the massive destashes I’ve done when moving or just clearing out in the past). According to the label, I paid ¥900 for this polish. I purchased the Vintage Rose nail wraps from Scratch’s Kickstarter campaign last year for $25.00 for a set of 3 wraps. They are currently out of stock on the Scratch online shop, but they may be restocked someday.