GOT Polish Challenge: Flowers with Sally Hansen Hard As Nails Xtreme Wear in Wet Cement and L.A. Colors Color Craze Minis

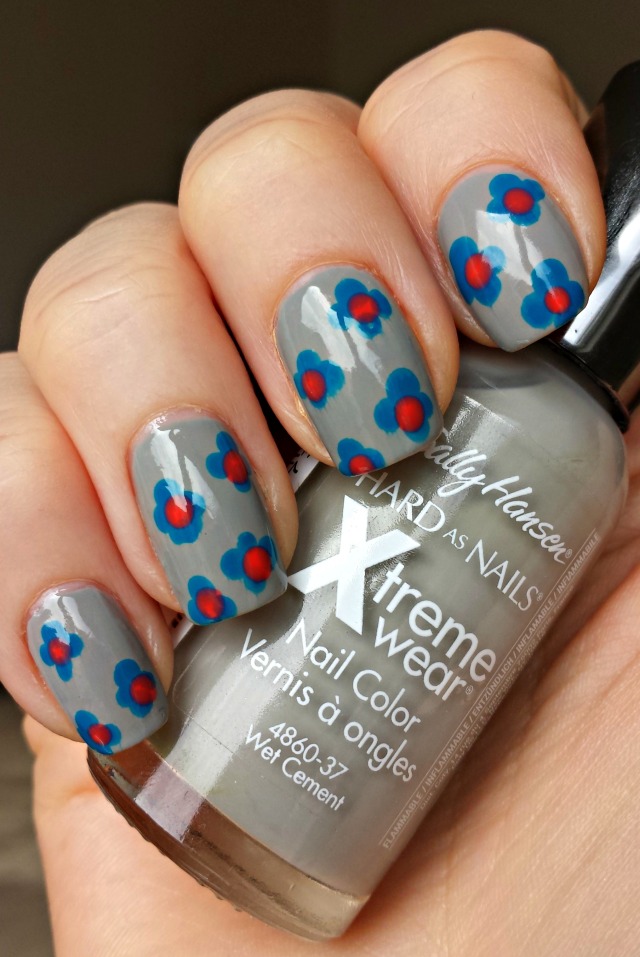
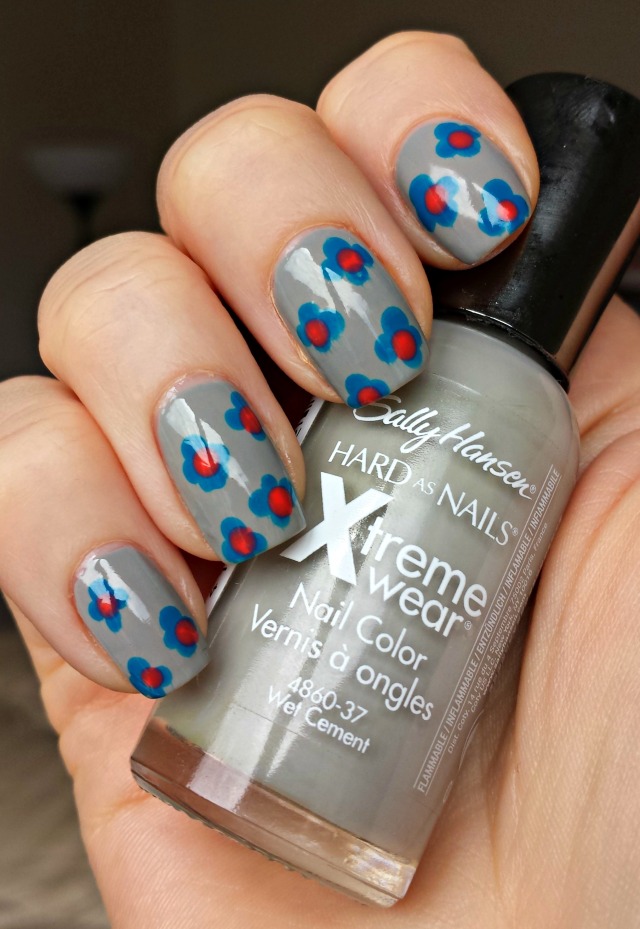
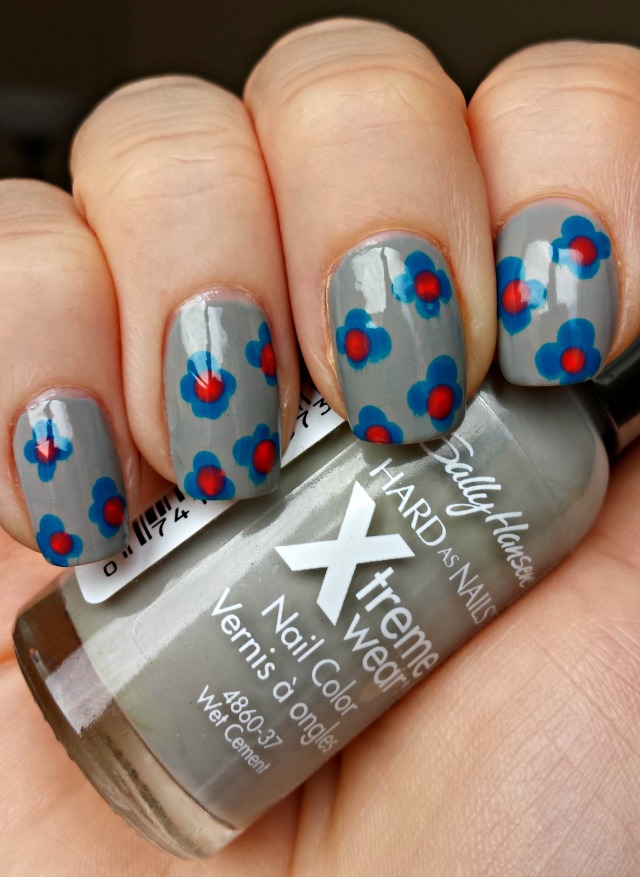
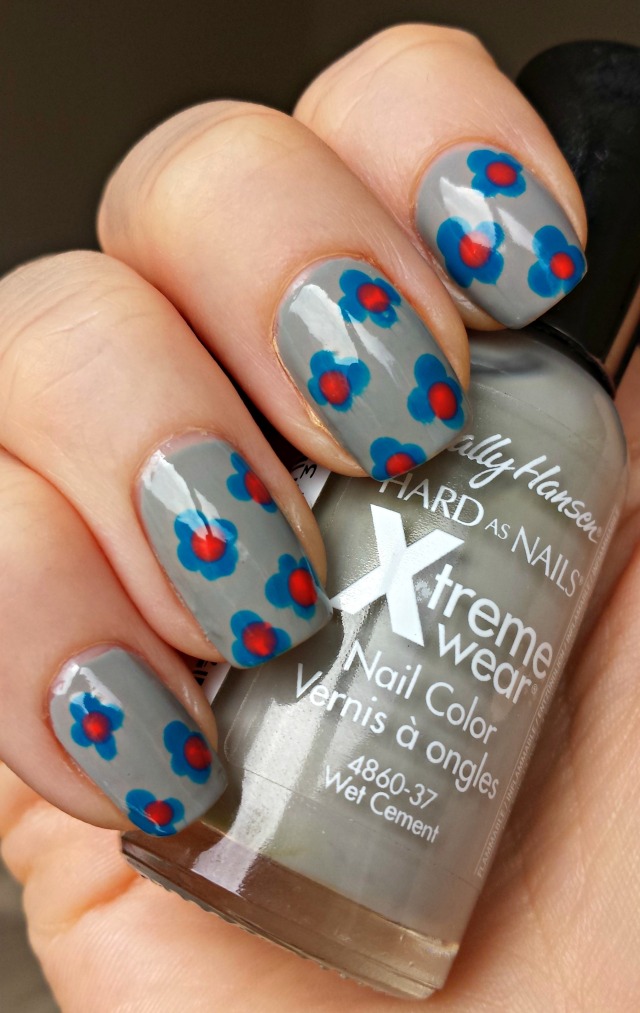
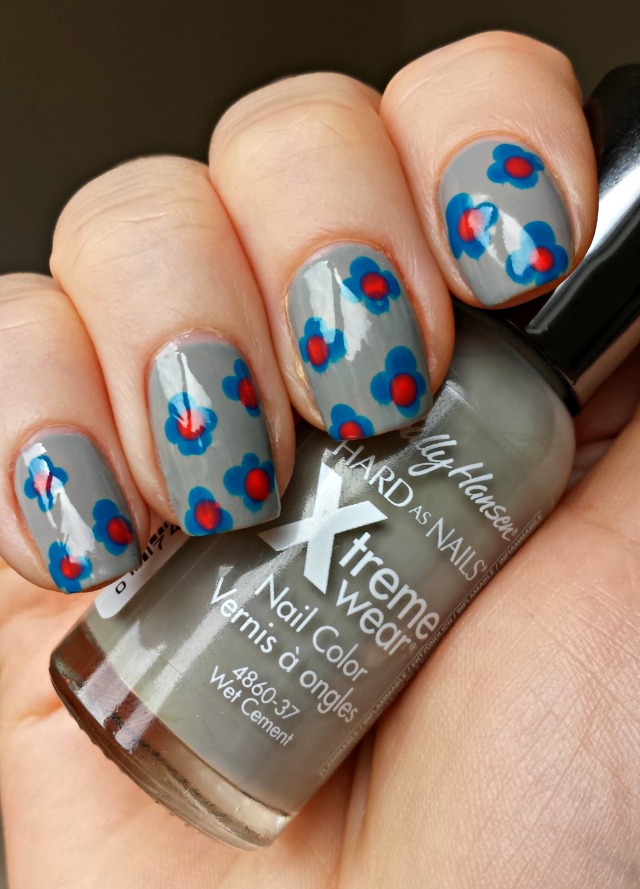
This week’s theme for the Golden Oldie Thursday Challenge is flowers.  I wasn’t too inspired by this theme at first, mostly because the ideas I had seemed like they would take forever to do and I just have practically no free time anymore.  I finally realized that I could do a simple flower mani using a dotting tool as I’ve seen so many other bloggers do.  That made me feel much better about tackling this challenge!  I still had to do the mani over a couple of days, but I did it.

I used Sally Hansen Hard As Nails Xtreme Wear in the color Wet Cement as the base color for this mani.  This color is a medium, cool-toned grey shade that works well as a neutral base for nail art.  Although I like the color, the application of this one wasn’t great, probably due to its age.  It took forever to dry, and I ended up with sheet marks in it even after letting it dry for a few hours before going to bed.  These seem to have evened out somewhat with the top coat, but it still took too long to dry IMO.  I used two coats of it as the base for this mani.

To add the watercolor flower look, I used two L.A. Colors Color Craze mini polishes that I’ve had for a few years.  I know I bought them in a set of mini polishes, but the shade names aren’t on the bottles so I’m not sure what they’re called.  One is a bright medium blue shade and the other is a vivid pink shade.  These had a thinner consistency that I would normally use with a dotting tool, but I kind of like the somewhat watery, almost painting-like it effect it gave the flowers, so I think it worked out in the end.  I used my normal base and top coats for this mani as well.  The top coat did end up smearing the flowers a little in some places, but that is mostly because I wasn’t patient enough to wait until they had completely dried before I applied it.  The streaks are not really visible to the naked eye, so I’m not sweating them.

GOT Polish Flower Mani

GOT Polish Flower Mani

GOT Polish Flower Mani

GOT Polish Flower Mani

GOT Polish Flower Mani

Have you ever used this simple technique to create a flower mani?  I like how it turned out.

I purchased Sally Hansen Hard As Nails Xtreme Wear in Wet Cement a couple of years ago from a drugstore for somewhere around $1.50.  I purchased the L.A. Colors Color Craze minis a few years ago from Cherry Culture.  I’m really not sure how much I paid for them, but the brand is generally inexpensive.

GOT Polish Challenge: Hot Pink with Absolute! Neon Nail Color in Fuschia

This post is even later than I intended, and I’m sorry for that.  I didn’t get much time off from work in the past two weeks, so even though I was able to find time to do the hot pink challenge, I wasn’t able to find time to post it.  Until now!  Better late than never.

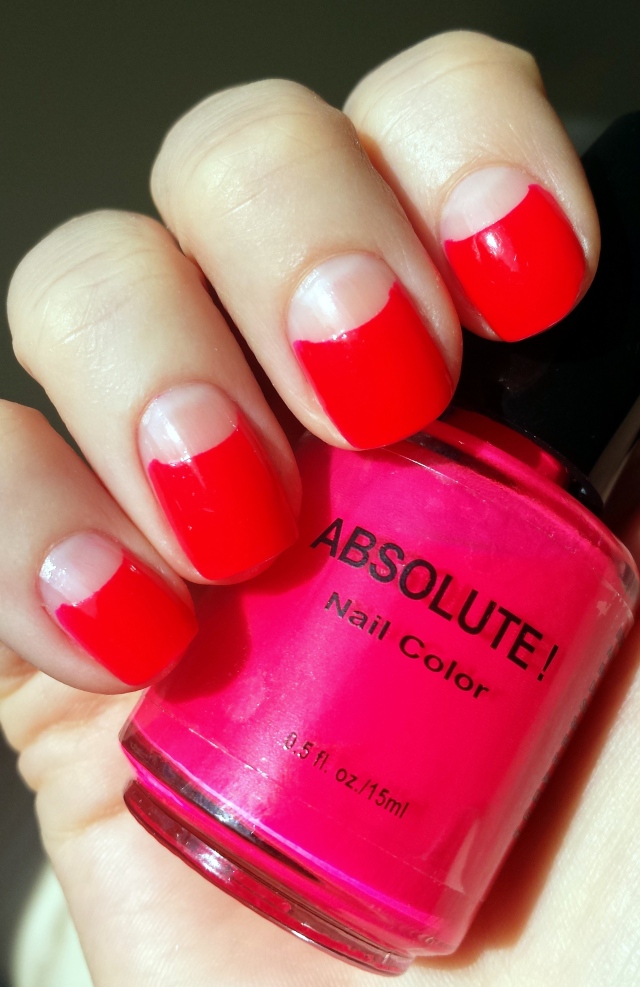
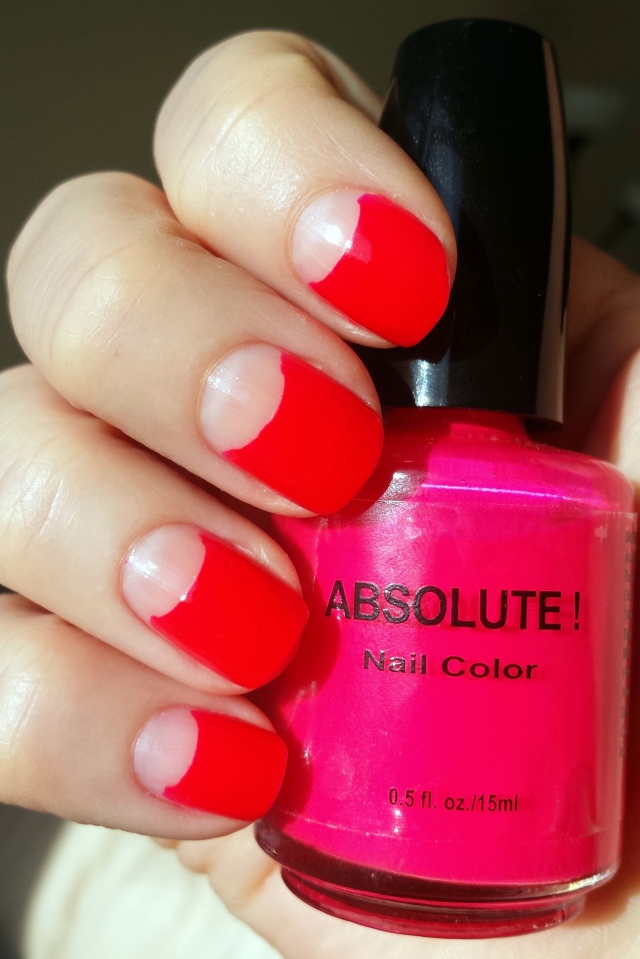
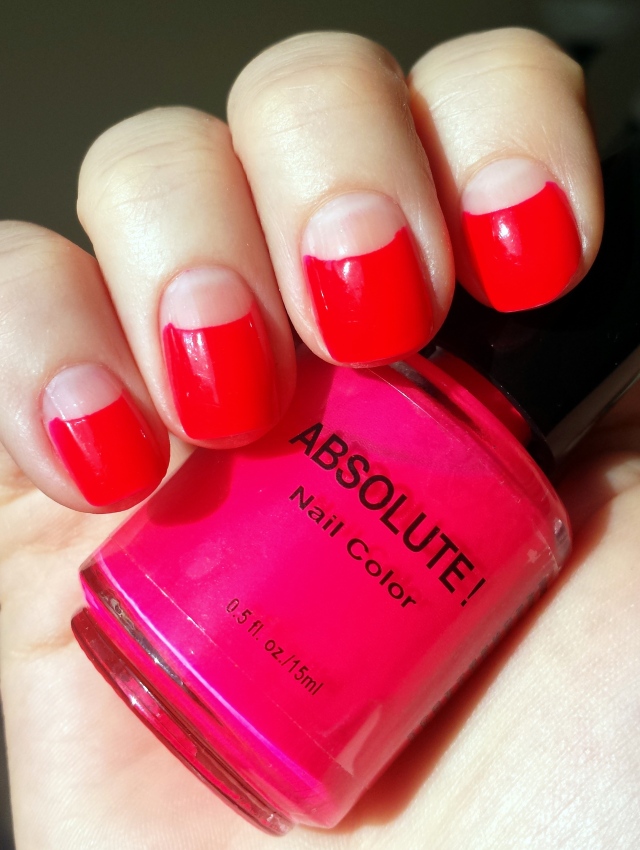
Last week’s Golden Oldie Thursday Challenge theme was hot pink!  I love pink and I love neons, so this was a fun one for me.  I decided to use a bright pink polish that I hadn’t used in a couple of years, Absolute! Neon Nail Color in Fuschia.
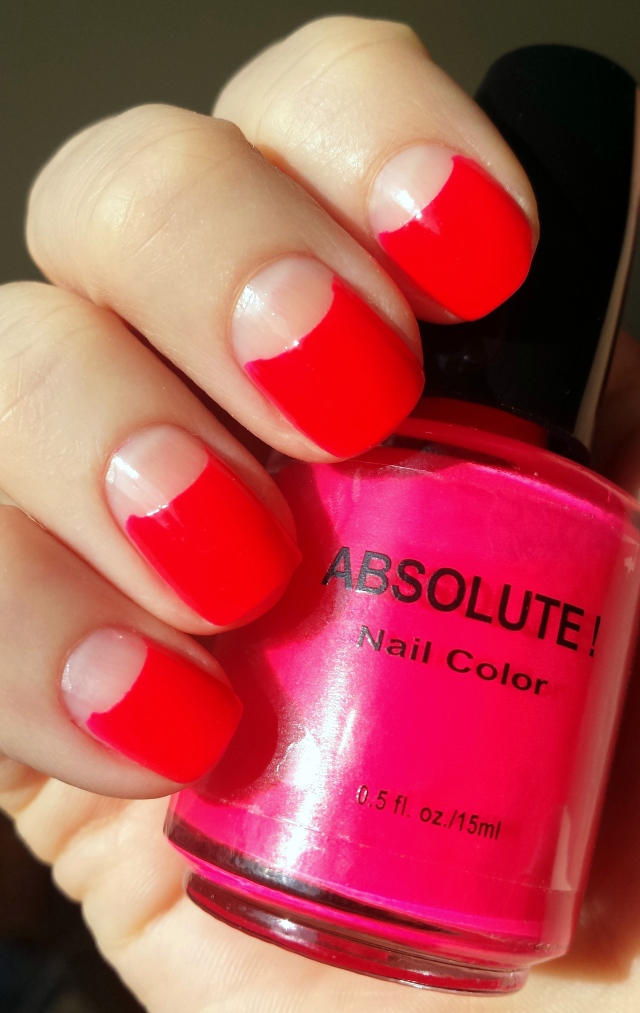
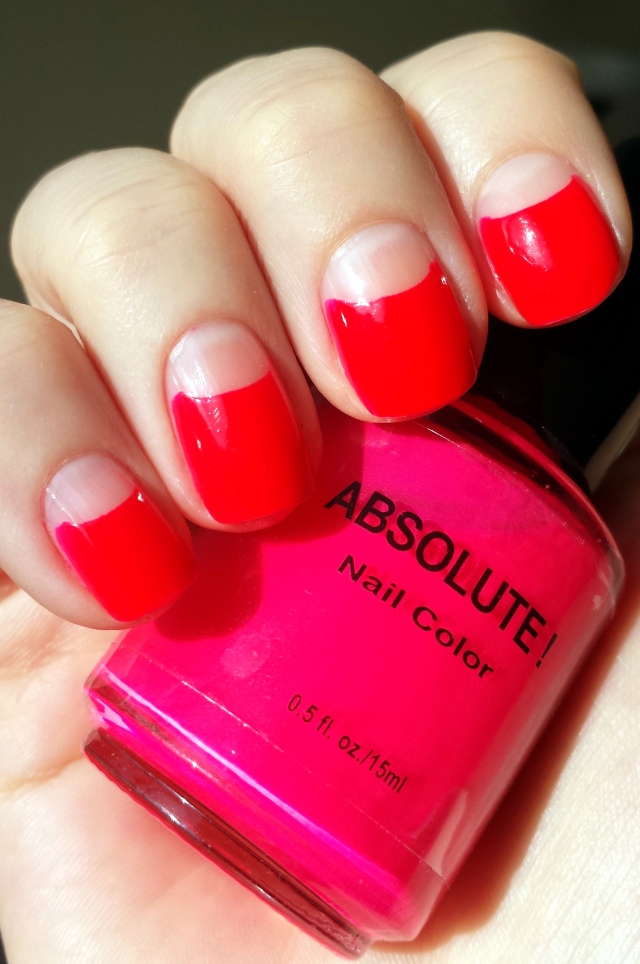
Fuschia is not exactly an accurate description of the color of this polish.  In the bottle it looks more like a bright, cool-toned pink color.  On the nail, however, it actually takes on a much warmer hue, and it really takes on the look of an orange-leaning pink neon.  In the photos you can see that the color in the bottle looks different from the color on the nail.  Some of the photos do make the color on the nail look redder than it does in real life; it really does look orangey-pink IRL.  It really is a bright and fantastic color, and I received lots of compliments on it while I wore it.  Because the color is so bright, I did a half-moon mani when I wore it so it wouldn’t look too garish.  The photos show two coats of Fuschia with my usual base and top coats.

(Please forgive the odd shape of my index finger nail.  I break my nails all the time at work, and rather than cut them down to the tiniest nubs, I’ve been trying to just file down the break in order to hang on to a little more length.  That does result in some odd nails shapes sometimes. :-/)

Absolute! Neon Nail Color in Fuschia

Absolute! Neon Nail Color in Fuschia

! Neon Nail Color in Fuschia

! Neon Nail Color in Fuschia

! Neon Nail Color in Fuschia

What do you think of this mani?  I love the way it turned out, and it was nice to wear bright, fun nails for a few days.

I purchased this polish 3 years ago from the Nicka K online shop for around $1.50 during a sale.  It is still available for purchase there.

GOT Polish Challenge: Ruffle Mani with Hard Candy Vibe, Trailer Trash, and Angel

Oh hai!  I’m back again after another extremely busy week.  I’m really hoping things die down enough that I’m able to post more than once a week soon.  As awful as it is, I just haven’t been able to make my nails my top priority lately. :-p

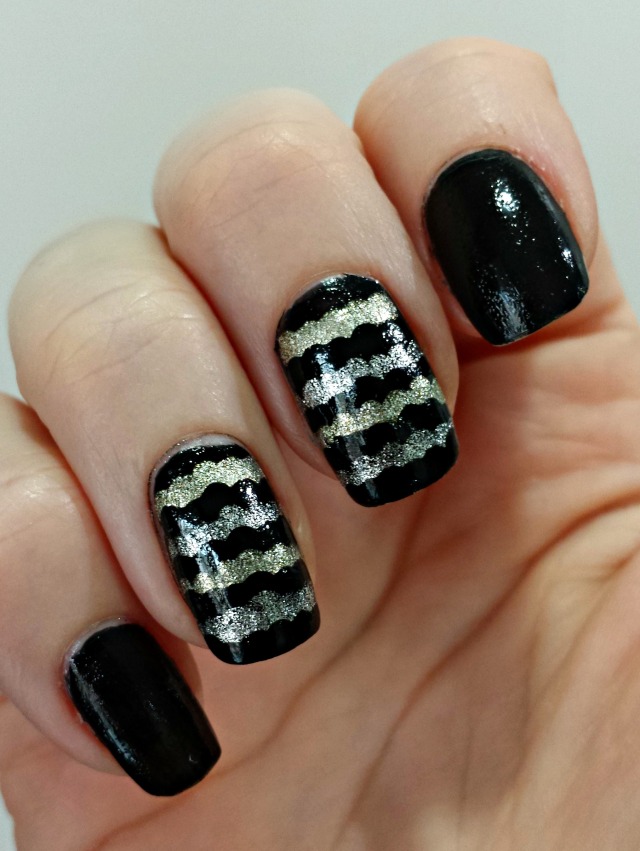
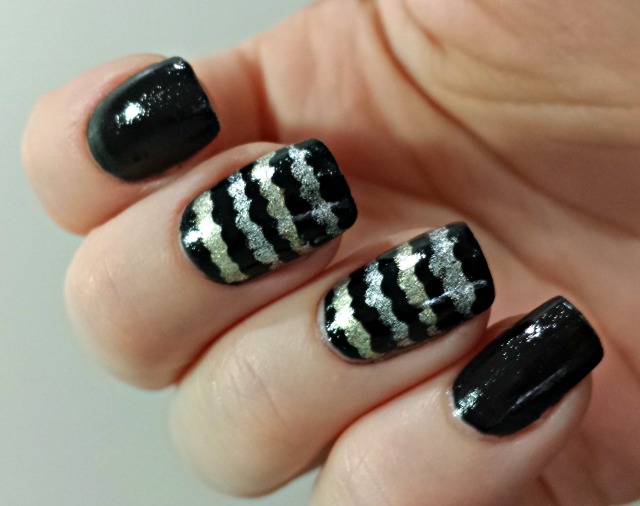
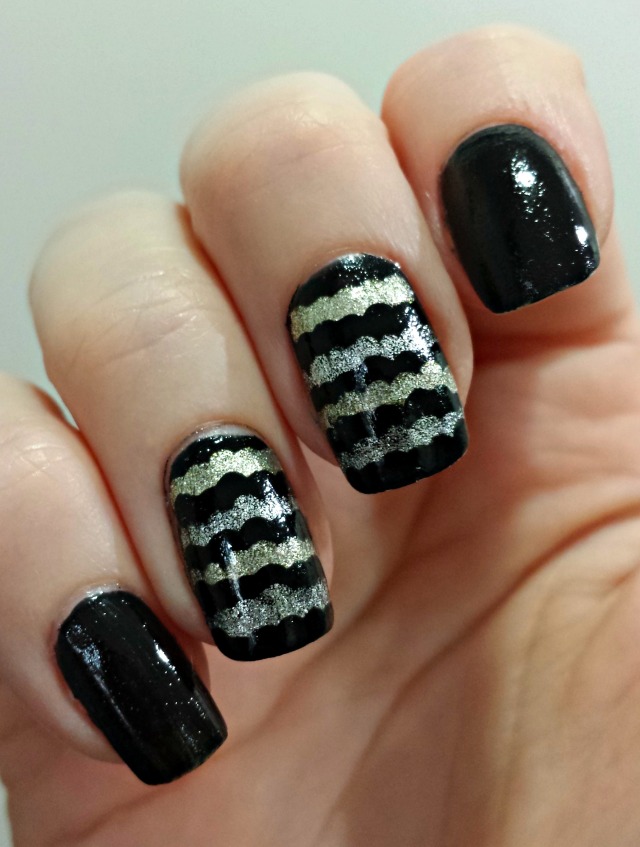
This week’s Golden Oldie Thursday Challenge (details about the challenge can be found on my original blog post about it) theme is ruffle manis!  I hadn’t done a ruffle mani before, so I was really looking forward to trying it out.  It ended up taking so long that I only did it on two accent nails, but it looks great!  I decided to use some Hard Candy mini polishes that I purchased ages ago for this one.

Vibe is a one-coat black creme polish, Trailer Trash is a metallic silver, and Angel is a metallic gold polish.  Despite being very old, all of these applied easily and dried quickly.  They also all had excellent coverage; I only used one coat of the black on the ‘plain’ nails, and it covered beautifully.  And these lasted forever.  I wasn’t able to change my polish all week (and yes, it drove me nuts), and most of my nails only had mild tip wear at the end of the week.  I was very impressed with the durability of these polishes.

The ruffle mani accent nails worked out pretty well, but they took a really long time to do.  I ended up adding to it a little at a time during the day and then trying to do other things in the interim.  I do like how it turned out, but I doubt that this is a design that I’ll do that often for that reason.  I used my normal base and top coat for this mani, and the top coat did smear the ruffle mani a little bit.  There was no way I was going to do it over again, so I apologize for this imperfect mani, but that’s the way it goes sometimes, isn’t it?

GOT Polish Ruffle Mani

GOT Polish Ruffle Mani

GOT Polish Ruffle Mani

Have you ever tried the ruffle mani look before?  Do you have any time-saving tips for doing one?  I do like the way it turned out, and if you average the time that it took to do over the amount of time that I wore it, maybe the time it took can be justified a little…

I purchased these mini Hard Candy polishes several years ago as part of a set.  They are no longer available for purchase at this time.

GOT Polish Challenge: Skittle with Black and Red Glitters

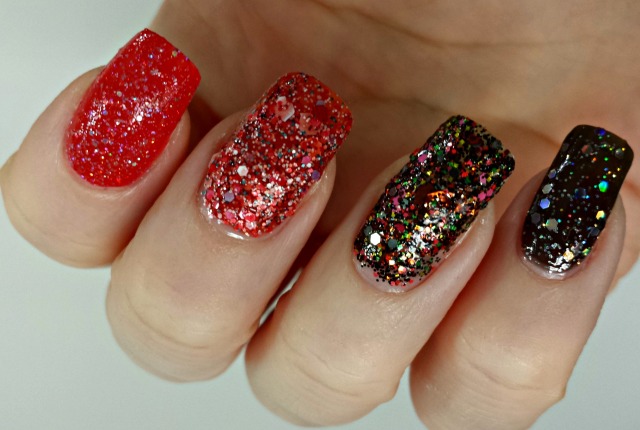
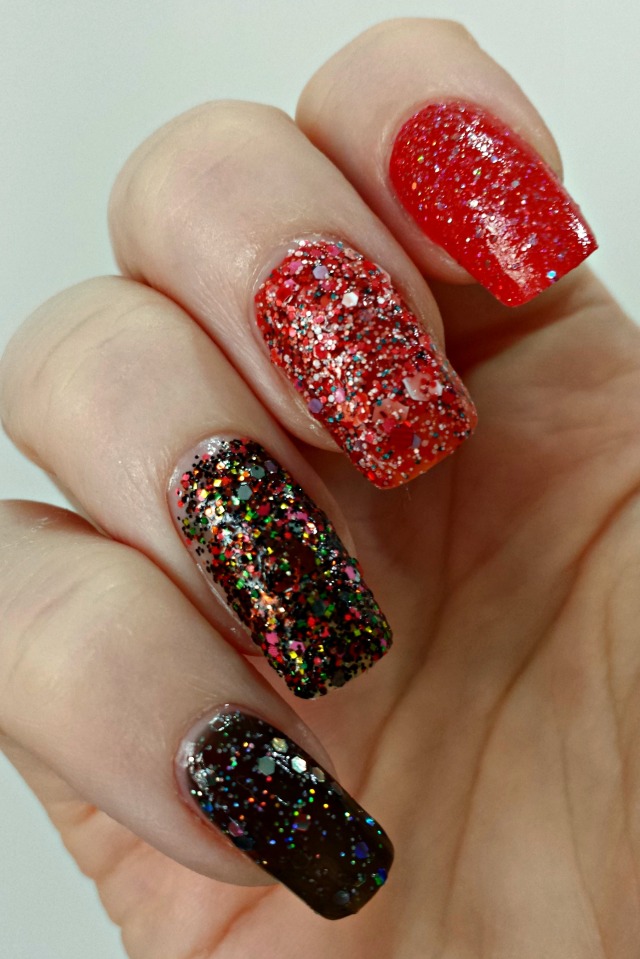
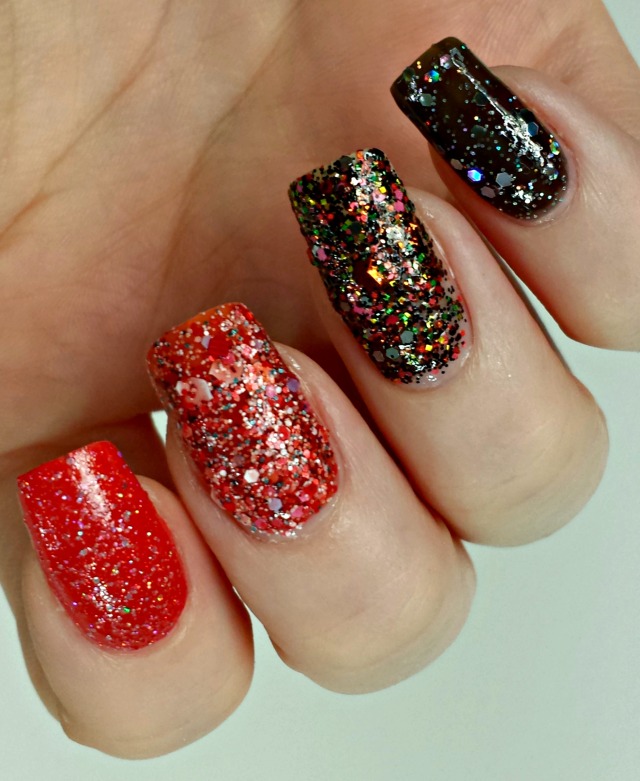
Today’s Golden Oldie Thursday Challenge theme (details of the challenge can be found in my original blog post about it) is a skittle mani!  I liked this theme because it allowed me to choose more than one of my older polishes to use again.  I decided to try a few of my old glitters to see if they still suit my fancy.

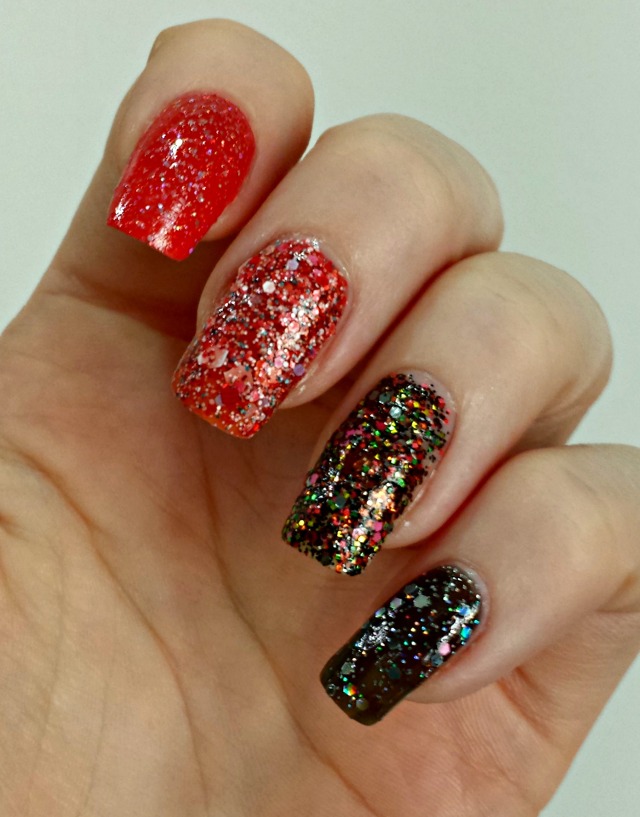
I used four polishes in this skittle mani to transition it from black on one side to red on the other.  The polishes used are NYX Girls Frizzy Spots, a black jelly base with small and medium-sized silver holographic glitter; Naild’It Unique Polish in Girls Gone Wild in Camo, a multi-colored glitter mix of matte and shiny with red, pink, green, silver, brown, yellow, orange and black in a clear base; Naild’It Unique Polish in Strawberry Whine, a multi-colored matte glitter mix in tones of red, pink, white, green and a hint of purple in a sheer red jelly base; and China Glaze Dynasty, which has a tomato red base with lots of small holographic glitter.  I applied all of these over a glitter base and used a fast-dry top coat for the photos.

GOT Polish Challenge Skittle

GOT Polish Challenge Skittle

GOT Polish Challenge Skittle

GOT Polish Challenge Skittle

Do you ever wear skittle manis?  I don’t often wear a different polish on each nail, but I do sometimes, especially when I’m testing out polishes in a destash.

I purchased all of these polishes from different online stores.  If you’d like to know where I got a particular one, just let me know and I’ll try to figure out where I bought it.


GOT Polish Challenge: Chevrons with Barielle Baretini and Hits Speciallità Hard Rock

This week’s theme for the Golden Oldie Thursday Challenge (details of the challenge can be found on my original blog post about it) is chevrons.  I was eager to try this theme because I bought some nail vinyls a few weeks ago in chevron patterns, so this was a great excuse to try them out finally.  I decided to try for a delicate look for this mani, so I used two light colors to create the look (one of them is glitter, though, since every mani needs some flash).

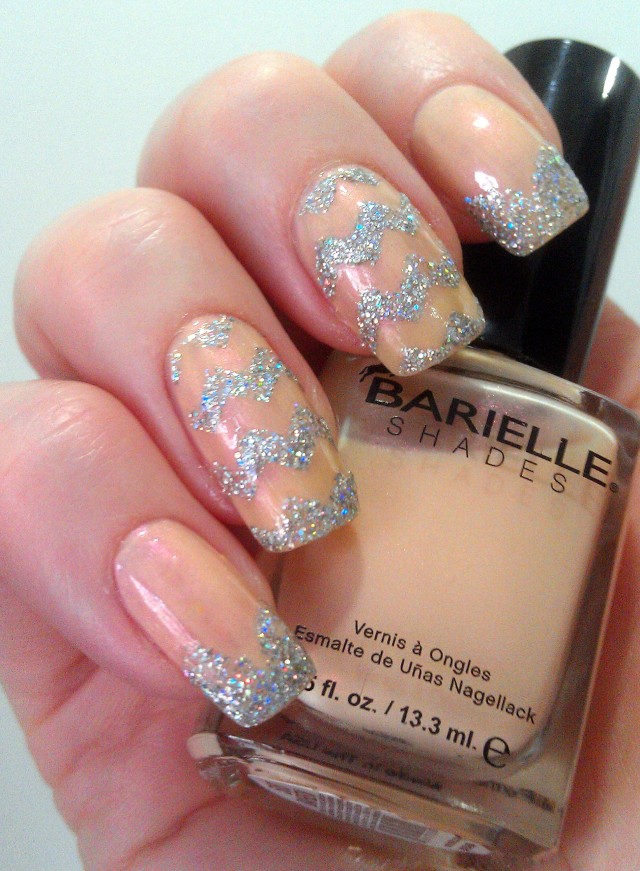
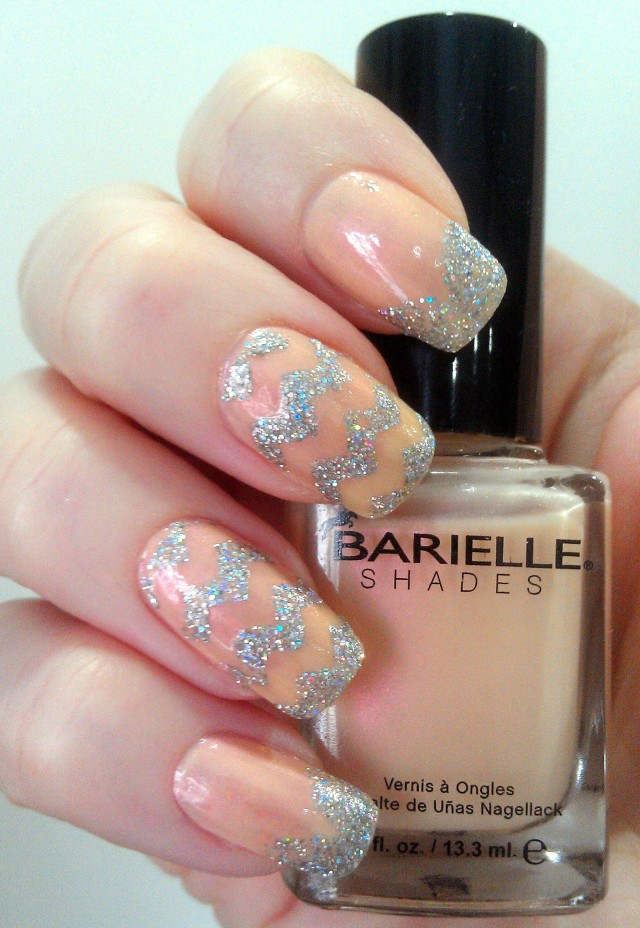
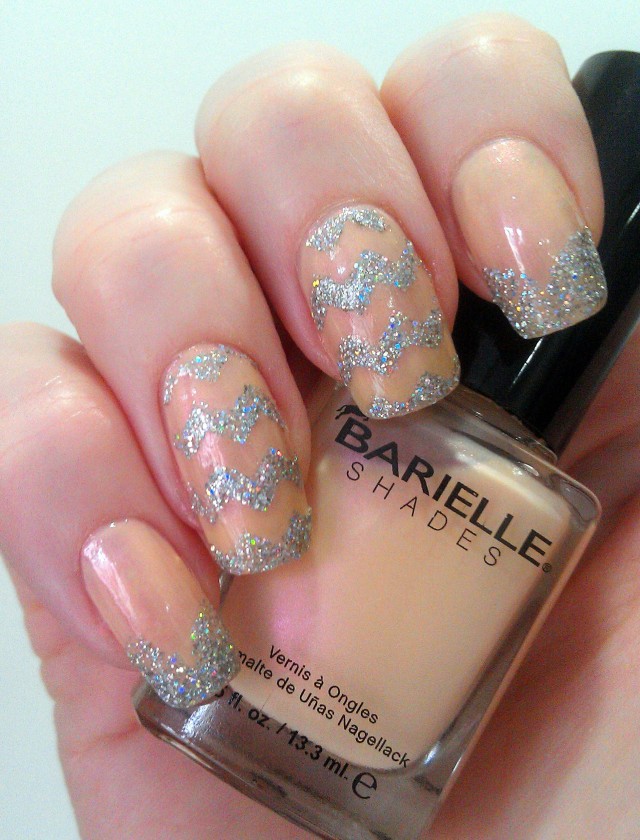
I used Barielle Shades in Baretini as the base for this mani.  Baretini is a soft, light pinky peach shade with a touch of pink shimmer.  Baretini is rather sheer, and it could be used as a nude shade on some skin tones.  It takes at least 3 coats to reach opacity with this polish, and I really didn’t have time for that, so I had to settle for two.  Some unevenness to the color is definitely visible, however.

To this base I added chevron accents using Hits Speciallità Hard Rock from their Glitter Forte collection.  Hard Rock is packed full of small silver holographic glitter in a clear base.  The glitter in this one is dense enough that it gives good coverage at one coat, though I prefer to use a second coat when applying this one on its own.  I applied Hard Rock over chevron nail vinyls for the chevron stripes effect, and I also free-hand painted chevron French tips on the other nails.

GOT Polish Challenge Chevrons

GOT Polish Challenge Chevrons

GOT Polish Challenge Chevrons

I think this look has a good combination of femininity and flash.  I do think it would look even better with a third coat of Baretini for the base, but sometimes time can make us compromise with our nail looks, sadly.

I purchased Baretini from the Barielle online shop three years ago for $4.00.  It doesn’t look like this color is available there anymore, but they may have something similar.  I purchased Hits Speciallità Hard Rock through a group buy of Brazilian polishes a few years ago, back when they were impossible to get in the States.  Now the Hits brand can be purchased from a few different online retailers.  I purchased the chevron nail vinyls from the Nail Vinyls online shop for $6.75 for a pack of 300.  It looks like they have doubled in price since I purchased them around 6 weeks ago, which is disappointing.

Nail Art NOTD: Valentine’s Nails with Pahlish Total Eclipse of the Heart

There are so many great Valentine’s collections from polish brands this year, and they have really put me in the mood for girly, pink, heart-covered nails.  I knew I must have a pink and red glitter polish already (all right, I probably have a few), so I looked through my stash and found one that reminded me of Valentine’s Day, Pahlish’s Total Eclipse of the Heart.

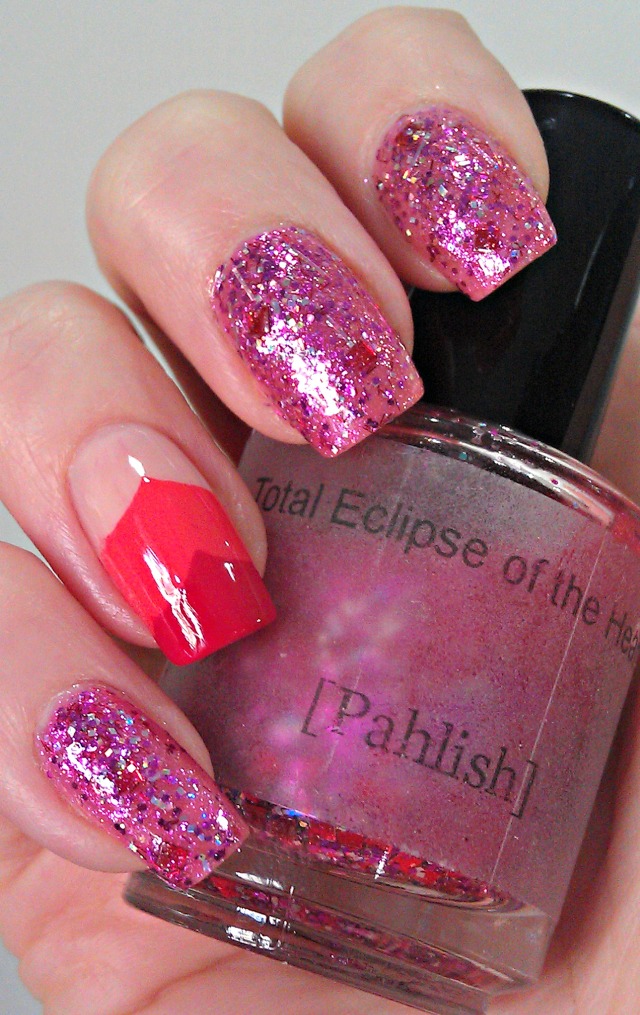
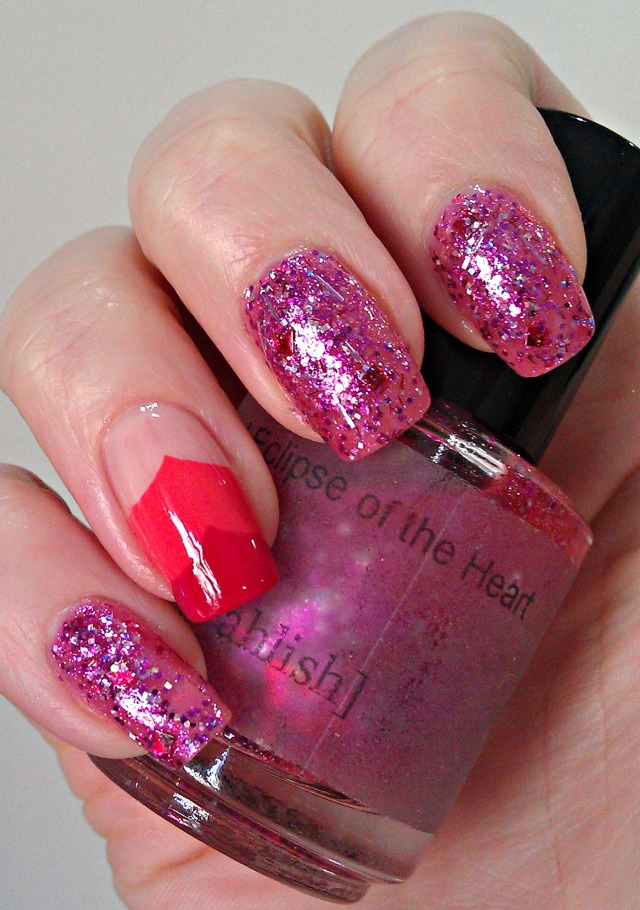
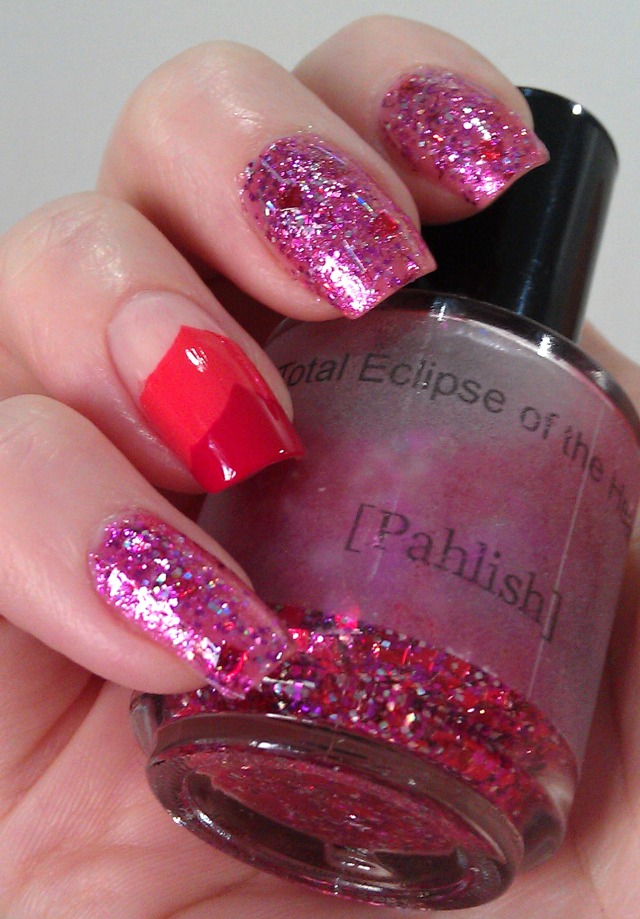
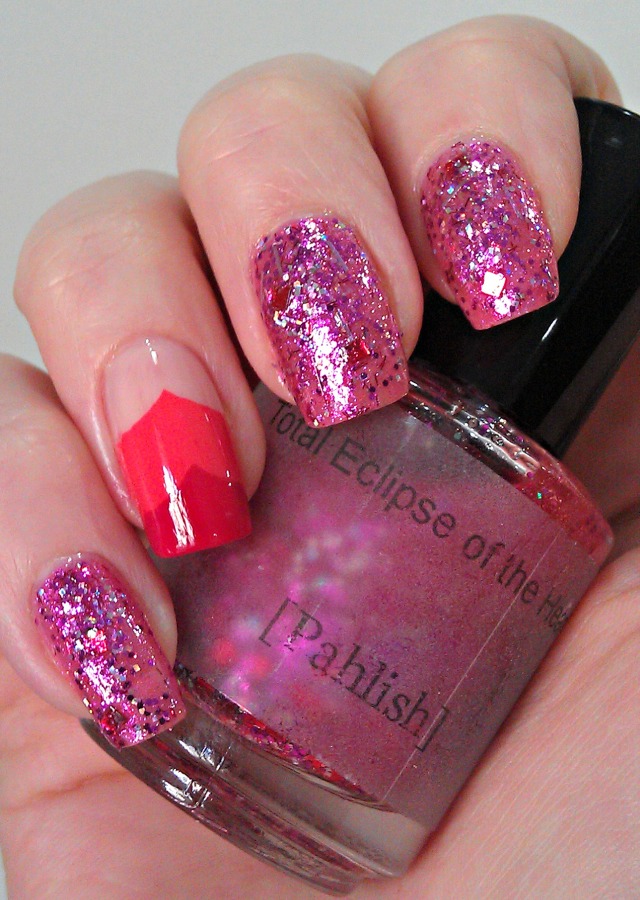
Total Eclipse of the Heart has a light pink jelly base packed with pink shimmer.  Added to this base is small silver holographic and pink glitter, some tiny pink bar glitter, larger silver bar glitter, and large red square glitter.  There’s a lot of glitter going on in this one, so I may have missed something, but those are what jump out at me on the nail.

The application for this one was somewhat tricky, as these glitter bomb polishes can be.  The red square glitters are very difficult to get out of the bottle, and they will be missing from your mani entirely unless you put a lot of effort into getting them out.  I ended up painting two quick coats that had no red glitter, than I went back over with a third coat in which I fished the red glitter out (which took some effort) and dabbed it onto the final look.  The red glitter is really what makes the look of this polish, so the effort was worth it.  I achieved good coverage after three coats, but I probably would have used a fourth if I hadn’t been afraid of covering the red glitter that I had just painstakingly placed on my nails.  The consistency of this polish was on the thin side, although it was not difficult to work with, and it dried quickly.  I used my normal base and top coat with it for the photos.

I decided to add some interest to this mani by doing an accent nail that I modified from a simple tutorial I saw on The Beauty Department’s nail art Pinterest page.  The tutorial used the reinforcement stickers for loose-leaf paper that we all use for half-moon manis to create a chevron mani that has the look of hearts.  It’s super cute and perfect for Valentine’s Day.

Pahlish Total Eclipse of the Heart with nail art accent

Pahlish Total Eclipse of the Heart with nail art accent

Pahlish Total Eclipse of the Heart with nail art accent

Pahlish Total Eclipse of the Heart with nail art accent

What do you think of this girly Valentine’s Day mani?  I love it!  I think the accent nail is the cutest.  It is totally reminiscent of hearts on my nails.  I’m sure I’ll use this idea as inspiration again.

I purchased Pahlish Total Eclipse of the Heart a couple of years ago for $8.00 or $9.00.  This color is no longer available, but Pahlish has other awesome colors available in their online shop.

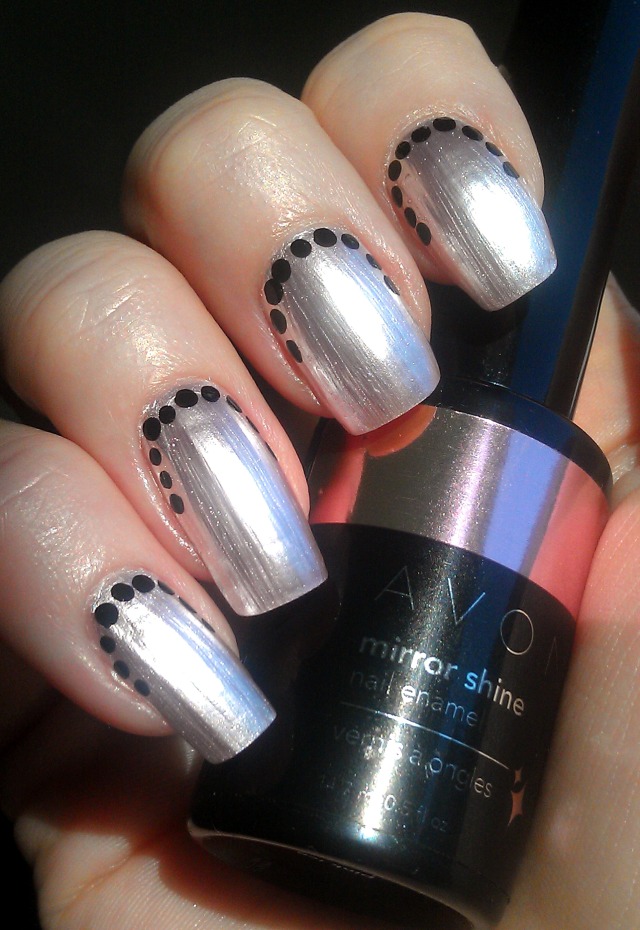
GOT Polish Challenge: Dots with Avon Mirror Shine Pink Ice

The theme for the Golden Oldie Thursday Challenge (details here) is dots!  I’ve had so much fun going through my polish stash since this challenge started.  In my explorations through my hoard I found an ancient Avon polish that I wanted to take for a spin, so I forced it into this week’s theme.

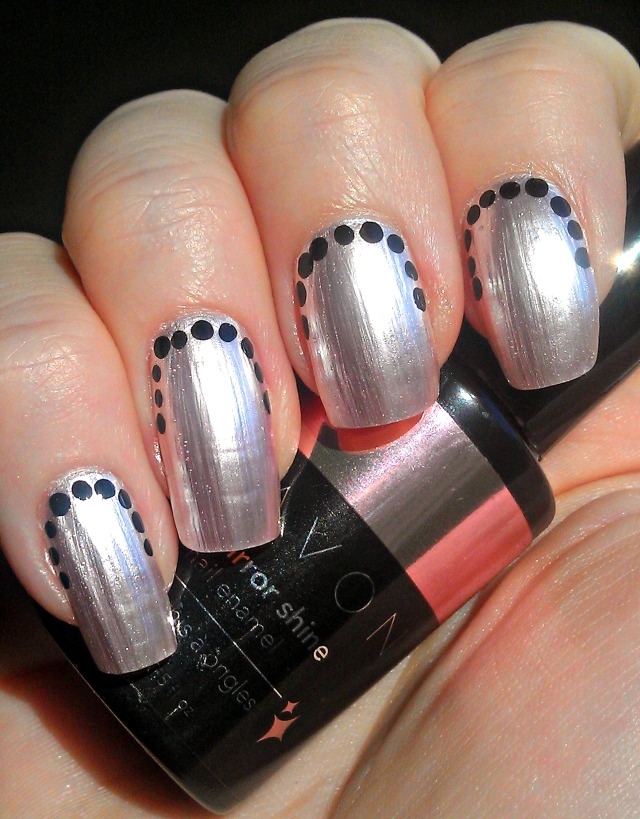
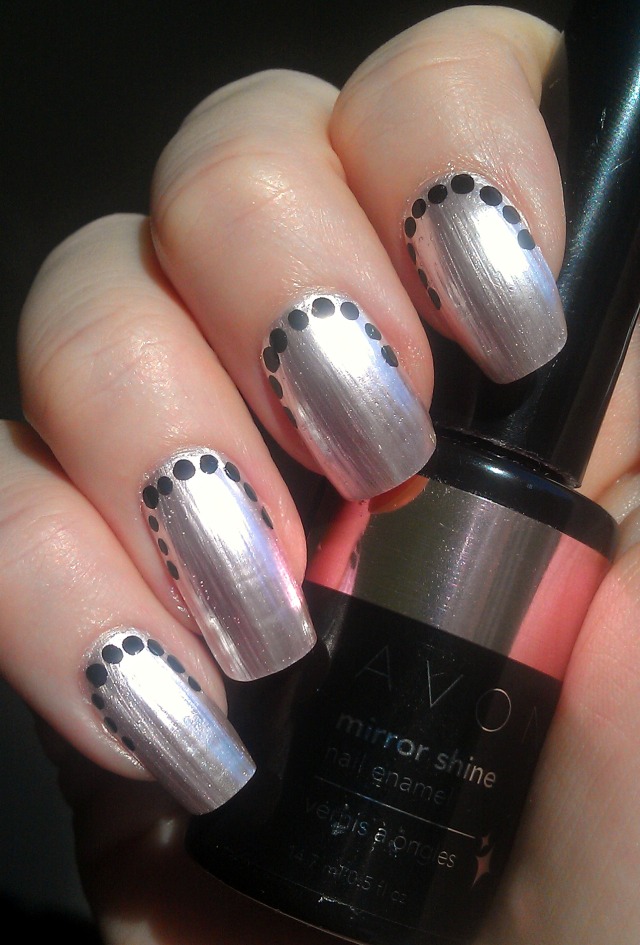
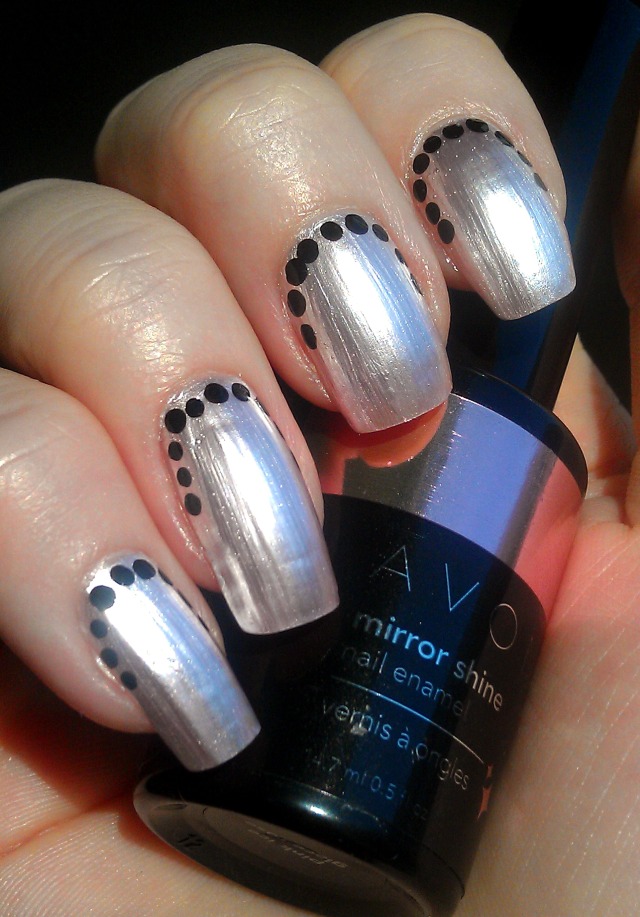
Avon Mirror Shine in Pink Ice is an extremely light pink chrome finish polish.  The color is about as light as pink can get before it becomes white; I remember being disappointed when I got this one all those ages ago because the color on the label is about 20 times darker than the actual color of the polish.  I’ve kept it all this time, though, because I really don’t have another polish that has this extreme of a chrome finish.

The application of Pink Ice has all the problems that one would expect of a mirror chrome:  it’s streaky and magnifies every nail ridge and flaw.  That being said, it’s the kind of thing that we only notice on our own manicure, and everyone else who sees it thinks it looks amazing.  I was afraid to use a base coat with this one in case it got even streakier (is that a word?), but I did use my standard top coat with it, and it did not dull the finish at all.

I wanted to add dots without spoiling my view of the mirror finish, so I added a simple black dotted accent to each nail using an Art Club striper polish.  It was easy to work with and dried in a hurry, which is all I can ask from a nail art polish.

I used 3 coats of Pink Ice for the photos, and then added dots using the Art Club black striper.  I did not use a base coat for this mani, but I did use top coat.

Avon Pink Ice

pinkice2

Avon Pink Ice

pinkice4

Do you love or hate chrome finish polishes like Pink Ice?  I definitely think this polish is noticeable, and I know its flaws are much more visible to me than to anyone who’s checking out my nails.  All in all I think I like it more now than I used to do.  Still trying to decide if I’ll keep it…

I purchased this polish from Avon many years ago; it is no longer available for purchase at this time.

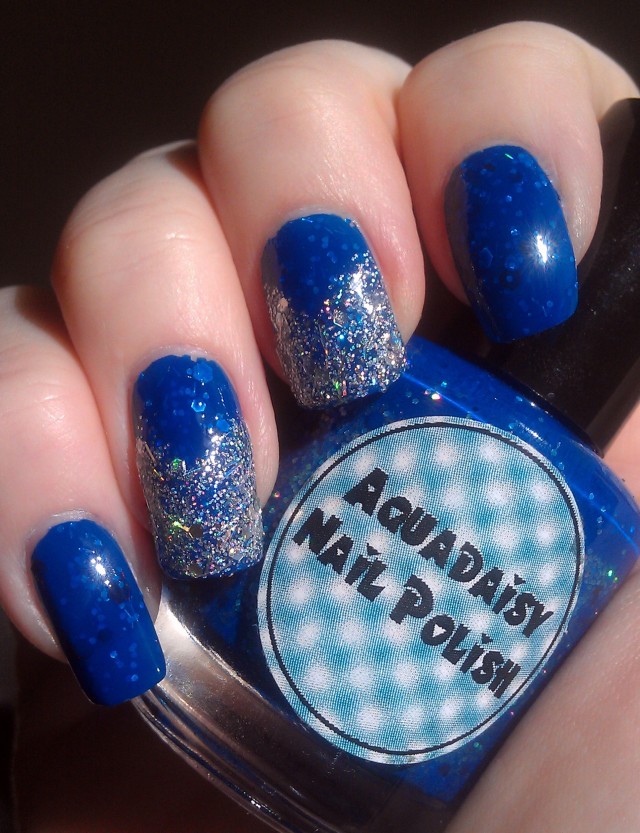
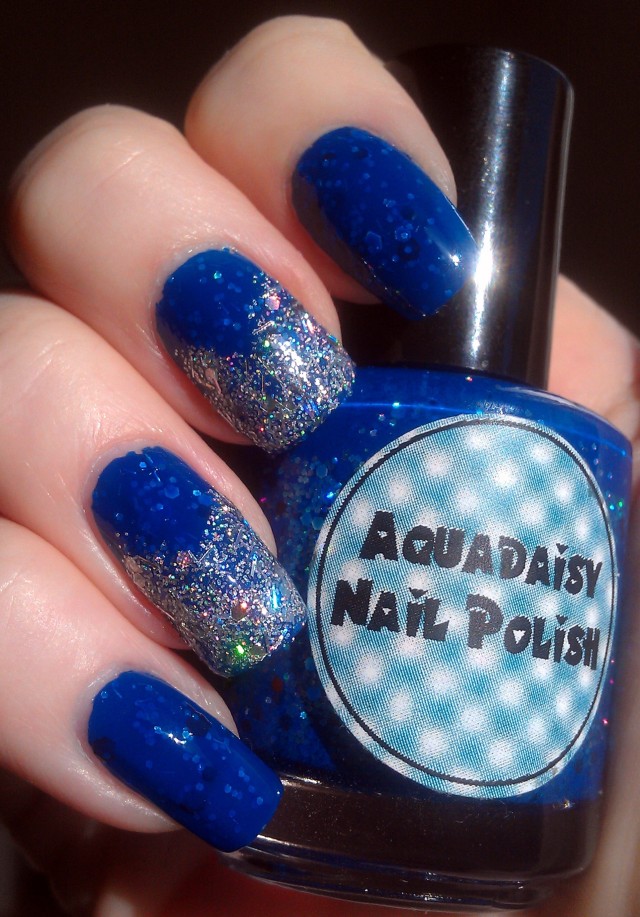
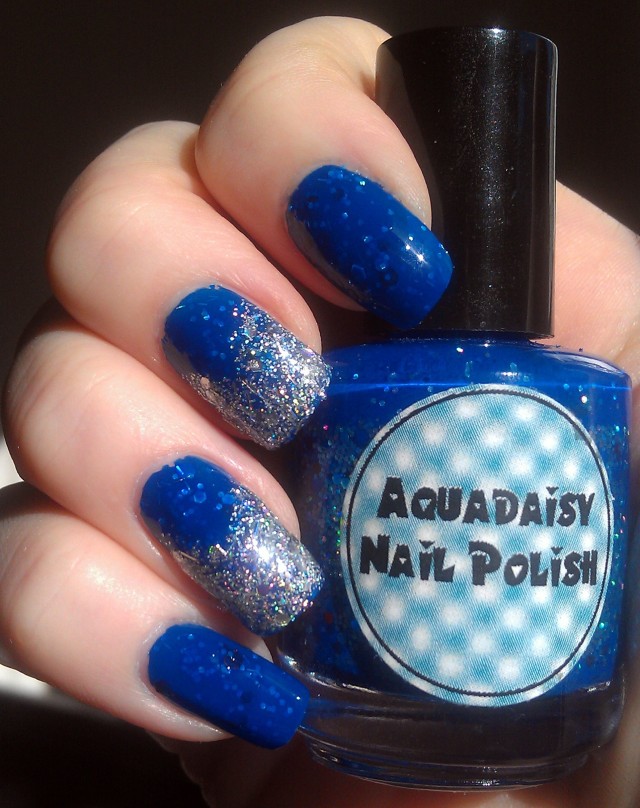
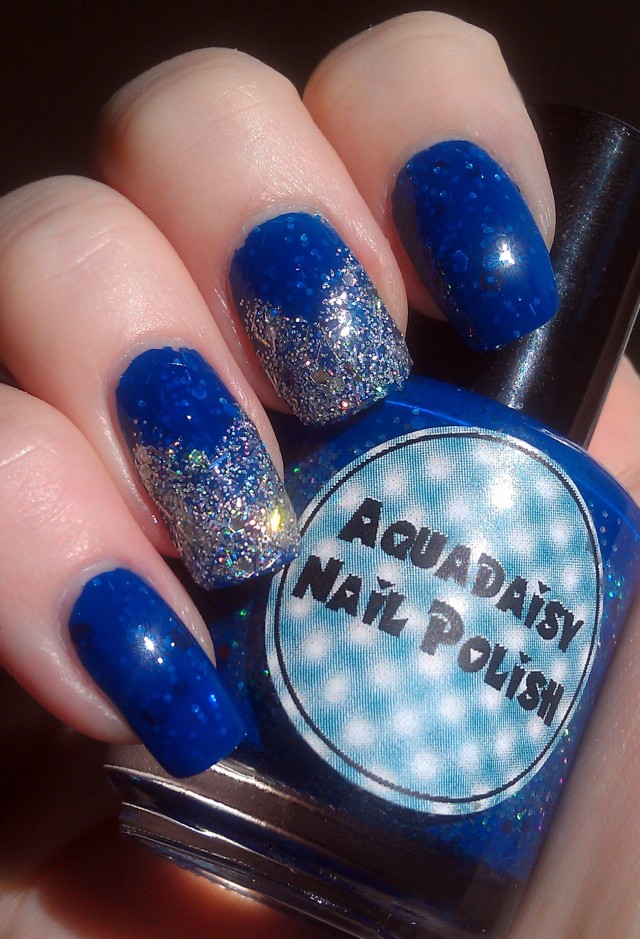
GOT Polish Challenge: Blue with AquaDaisy You’re a Firework and Lechat Dare to Wear Disco Ball

The theme of the third week of the Golden Oldie Thursday Polish Challenge (see my first post on the challenge for details) is blue!  I didn’t realize it until I started to clean out my stash recently, but I have more blue polishes than any other color, and now I’m noticing how much the blue options in new collections are the ones I often gravitate towards.  Even though I don’t consider it my favorite color, there’s just something breathtaking about a rich, bright blue that I can’t resist.  I used today’s theme as an opportunity to haul out a blue indie that I haven’t used in a while, AquaDaisy’s You’re a Firework.

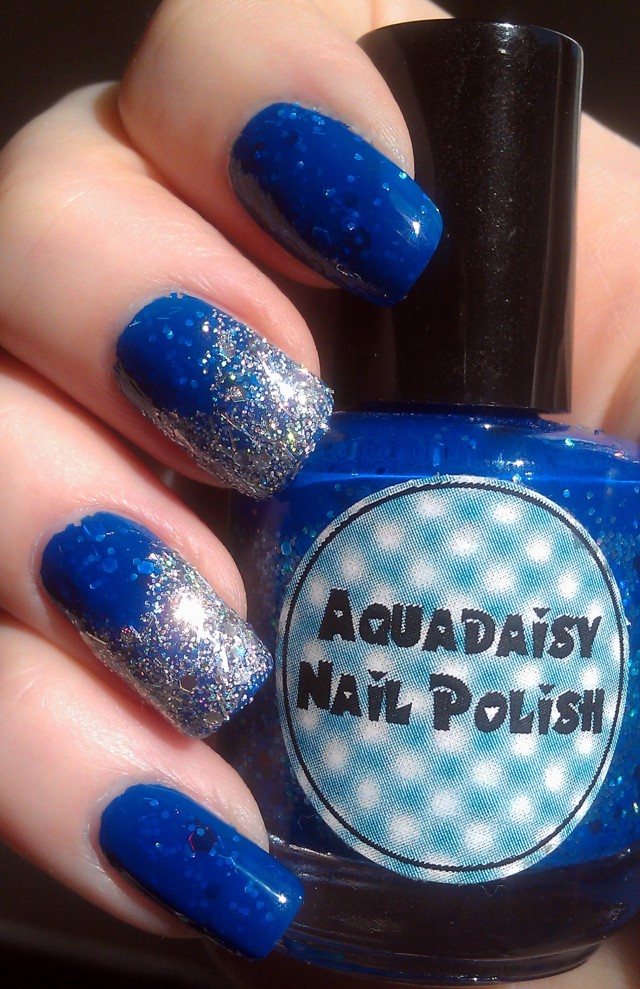
You’re a Firework has a bright blue base that is reminiscent of Klein blue, although it is a touch darker (though no less vivid).  Added to this is silver holo glitter and a sprinkling of red hex glitter.  The glitter is somewhat obscured by the richness of the base color, but it is definitely visible and does serve to add some interest to the base.

The application for this polish is a dream.  It is completely opaque in one coat, and I imagine a second coat might muddle the visibility of the glitter.  It dries quickly, and there’s something about the texture of this one that makes it apply perfectly.  I barely had to do any cleanup after using this, which is rare with such a dark base color.  I really couldn’t ask for a better experience using a polish.  I used this with base and top coat for the photos.  I also used Lechat Dare to Wear in Disco Ball to create accent nails.  Disco Ball is a dense mix of small, hex, and bar-shaped silver holographic glitters in a clear base.  The glitter in Disco Ball does not require any special effort during application.

AquaDaisy You're a Firework

AquaDaisy You're a Firework

AquaDaisy You're a Firework

AquaDaisy You're a Firework

AquaDaisy You're a Firework

Is there a color more gorgeous than that blue?  I haven’t seen one.  You can see that the glitter ends up adding a subtle accent to the beautiful base, rather than being the star of the show.  I like that the glitter steps back in this polish and lets that blue shine.

I purchased You’re a Firework a couple of years ago from the AquaDaisy online shop for $9.00.  It doesn’t look like this color is available at present, but you can always contact the seller and ask if it is still available.  I purchased Lechat Dare to Wear in Disco Ball from Head2Toe Beauty for $3.00 a few years ago.


GOT Polish Challenge: Stripes with Alta Costura Vernis Fine Print and Zoya Christinna

The theme for Week 2 of the Golden Oldie Thursday Challenge is stripes!  I have no natural artistic talent, so elaborate nail art is just never going to be my thing, but even the likes of me can use striping tape, so this simple nail art theme is right up my alley.  I’ve been having a blast looking through my stash for polishes that I once loved for a brief moment (which is increasingly starting to seem like the only way this magpie has ever loved a polish).  It was hard to settle on one for today’s challenge!

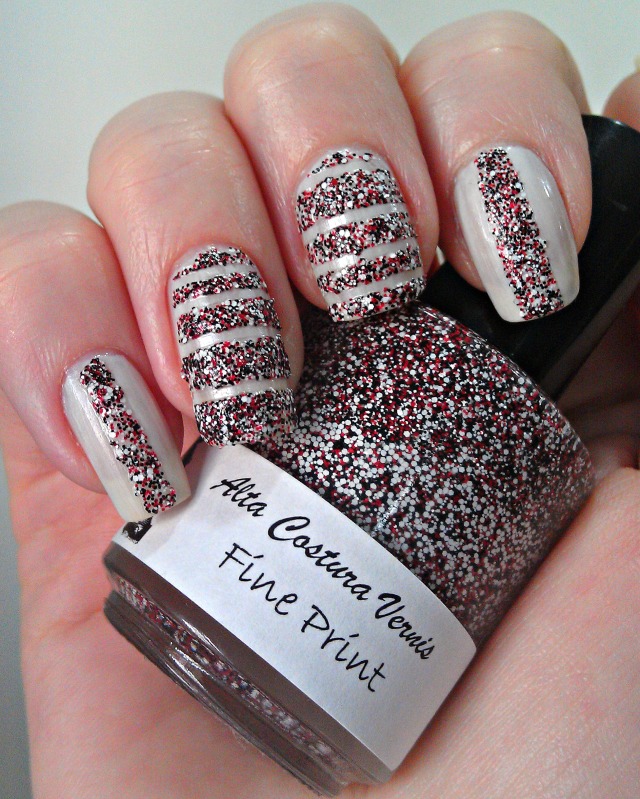
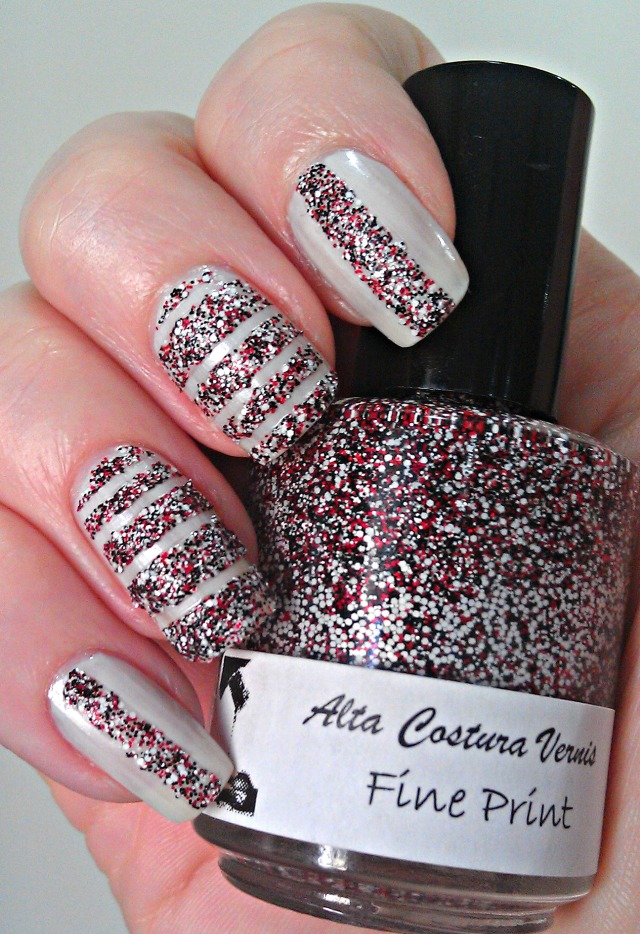
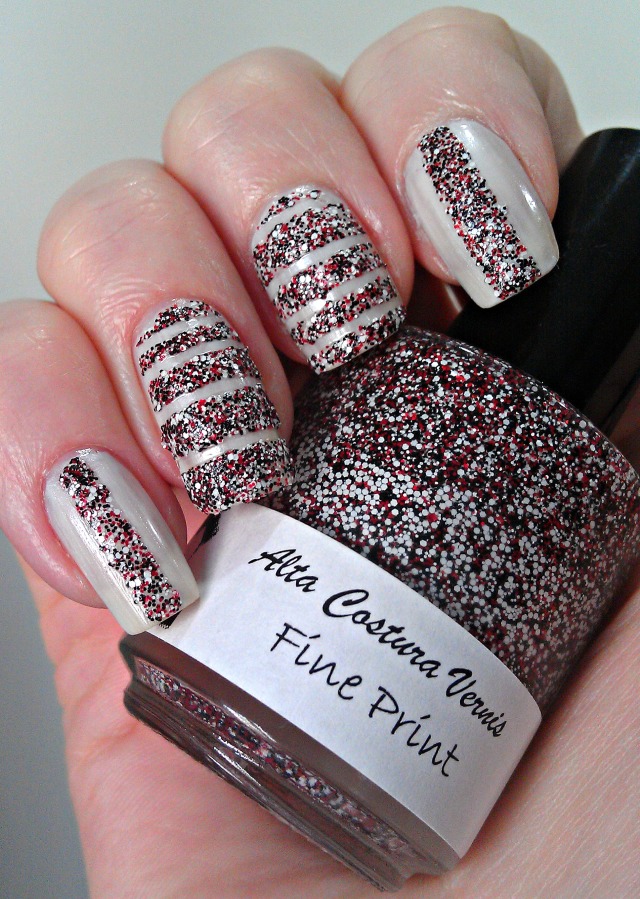
It must have been two or two and a half years ago now when all of us became obsessed with matte glitter at the exact same moment, and it was at that time that I purchased Fine Print from Alta Costura Vernis.  Fine Print is a textured polish that features white, black, and red micro glitter in a clear base.  This was one of the first intentionally textured polishes that I ever purchased, and I remember loving the finish as well as the combination of colors in this polish.  I also loved how the little white bits in it looked under the black light on a night out, because yes I am staring at my nails even when I’m at the bar.

I layered Fine Print over Zoya Christinna, which is one of the only white polishes that works with my skin tone.  Christinna is a soft, shimmery white that has the slightest hint of gray; it almost has the look of marshmallow creme or a fluffy white cloud.  I’ve used this shade several times in the 3 or 4 years that I’ve had it, and I always love the color and hate the application.  Christinna is very streaky, and no number of coats seems to be able to completely even it out.  In my experience it also takes longer to dry than most polishes, which wouldn’t be as bothersome if the polish weren’t so sheer.  In spite of these issues, though, I really do like the color and finish of Christinna, so I put up with her flaws.

I used two coats of Christinna as a base for this mani, then I used one coat of Fine Print over striping tape to make some stripes.  I was going for some gradation in the thickness of the stripes on the middle and ring finger, but my recently broken middle finger nail probably wasn’t long enough to show this effect properly.  I used base coat but no top coat for the photos.

Alta Costura Vernis Fine Print

Alta Costura Vernis Fine Print

Alta Costura Vernis Fine Print

Are you officially over these matte glitter textured polishes?  They seem to have definitely passed their peak in popularity.  I know I don’t wear them all that often anymore, but wearing this one again reminded me of how truly different they were from everything else that was out at the time.  I have noticed that all of my polishes that feature matte glitter tend to thicken up pretty quickly.  I had to add thinner to Fine Print before I could use it.

I purchased Fine Print for $8.00 or $9.00 (somewhere around there) from Alta Costura Vernis.  I’m not sure if this brand still exists, honestly.  I don’t see any evidence that they do.  I purchased Christinna from the Zoya online shop during a promotion (I only purchase from Zoya during their promotions).  It cost me $4.00 when it was on sale.  I don’t see this shade on their site, so it may have been discontinued.

Christmas Nail Art NOTD: Scratch Tartanium Nail Wraps

Of course I wanted my nails to look utterly fabulous for Christmas, but spending loads of time on them was not an option this year.  Luckily one of the nail wrap sets from Scratch’s December Monthly Mani Box had a Christmas-y look to it, so I wore them to this year’s Christmas Eve and Christmas Day gatherings.

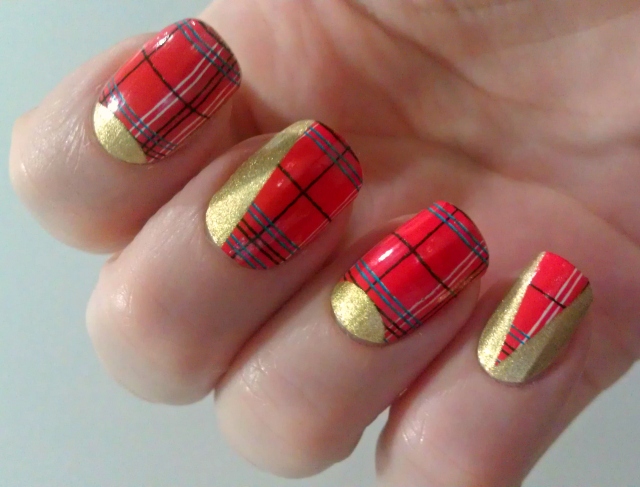
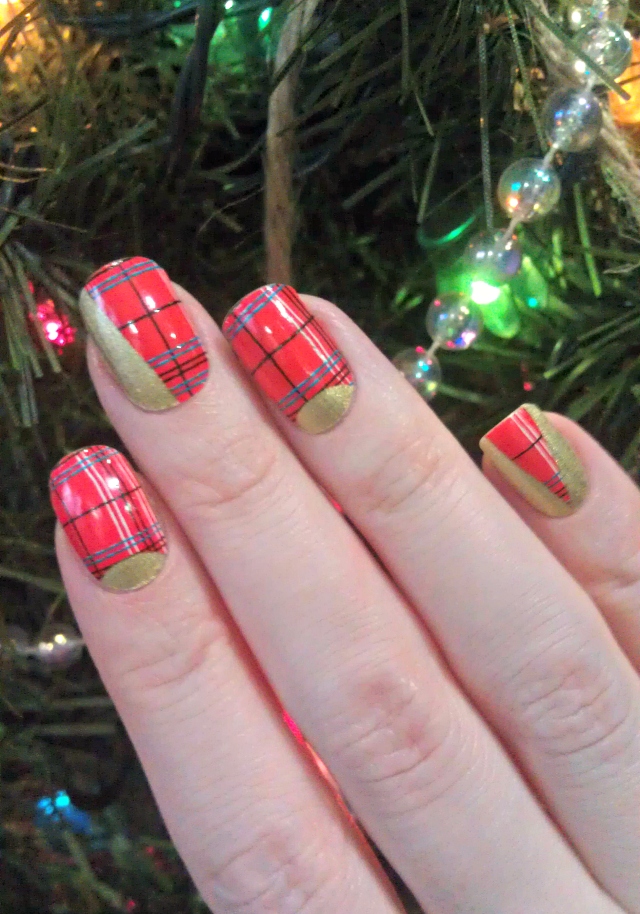
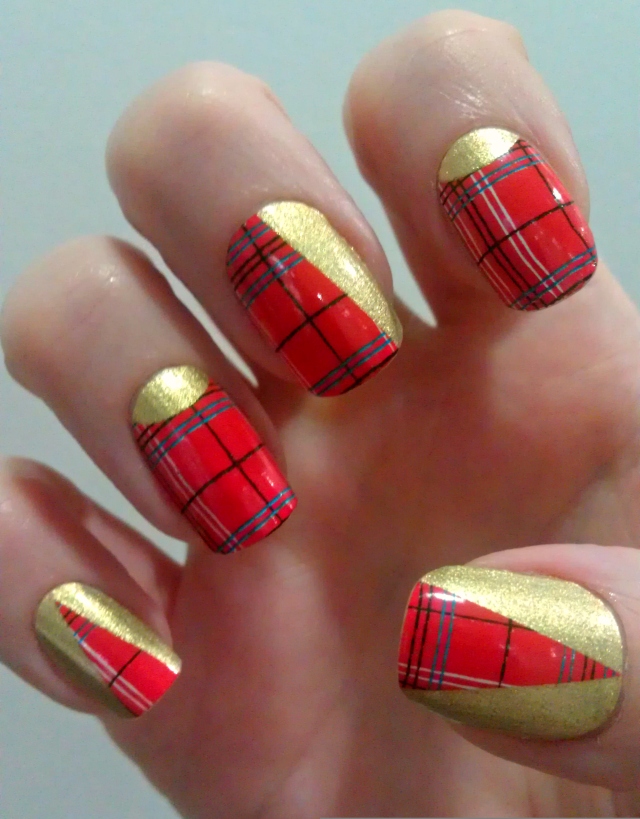
The Tartanium nail wraps were designed by textile designer Emily Wagner, and they feature a red-based plaid with metallic gold accents.  The set contains four different wrap designs of different sizes that can be mixed and matched, allowing the user to customize the look of the manicure to some extent.

The Scratch nail wraps are a little thicker than some other nail polish strips that I’ve tried, an advantage of which is that they can be moved around and re-positioned without tearing, which is not always possible with thinner wraps.  I did not use a base coat with these polish strips, but I did apply a top coat (in part because it is recommended by Scratch in the directions for use).

tartanium1

Scratch Tartanium

Scratch Tartanium

Aren’t these nice and seasonally appropriate without being over the top?  (Not that there’s anything wrong with over the top, don’t get me wrong.)  I was told that my nails looked like wrapped Christmas presents today, and I totally agree!  Love these.

I purchased these as part of a set of three nail wraps in the Scratch Monthly Mani Box for $30.00.  They can also be purchased individually for $12.00 from the Scratch online shop.